Article: Glorious Blue Floral- My everyday Journal Cover
Glorious Blue Floral- My everyday Journal Cover
This was my first "real" journal cover, as in, not a prototype. I made it for myself and still use it everyday.
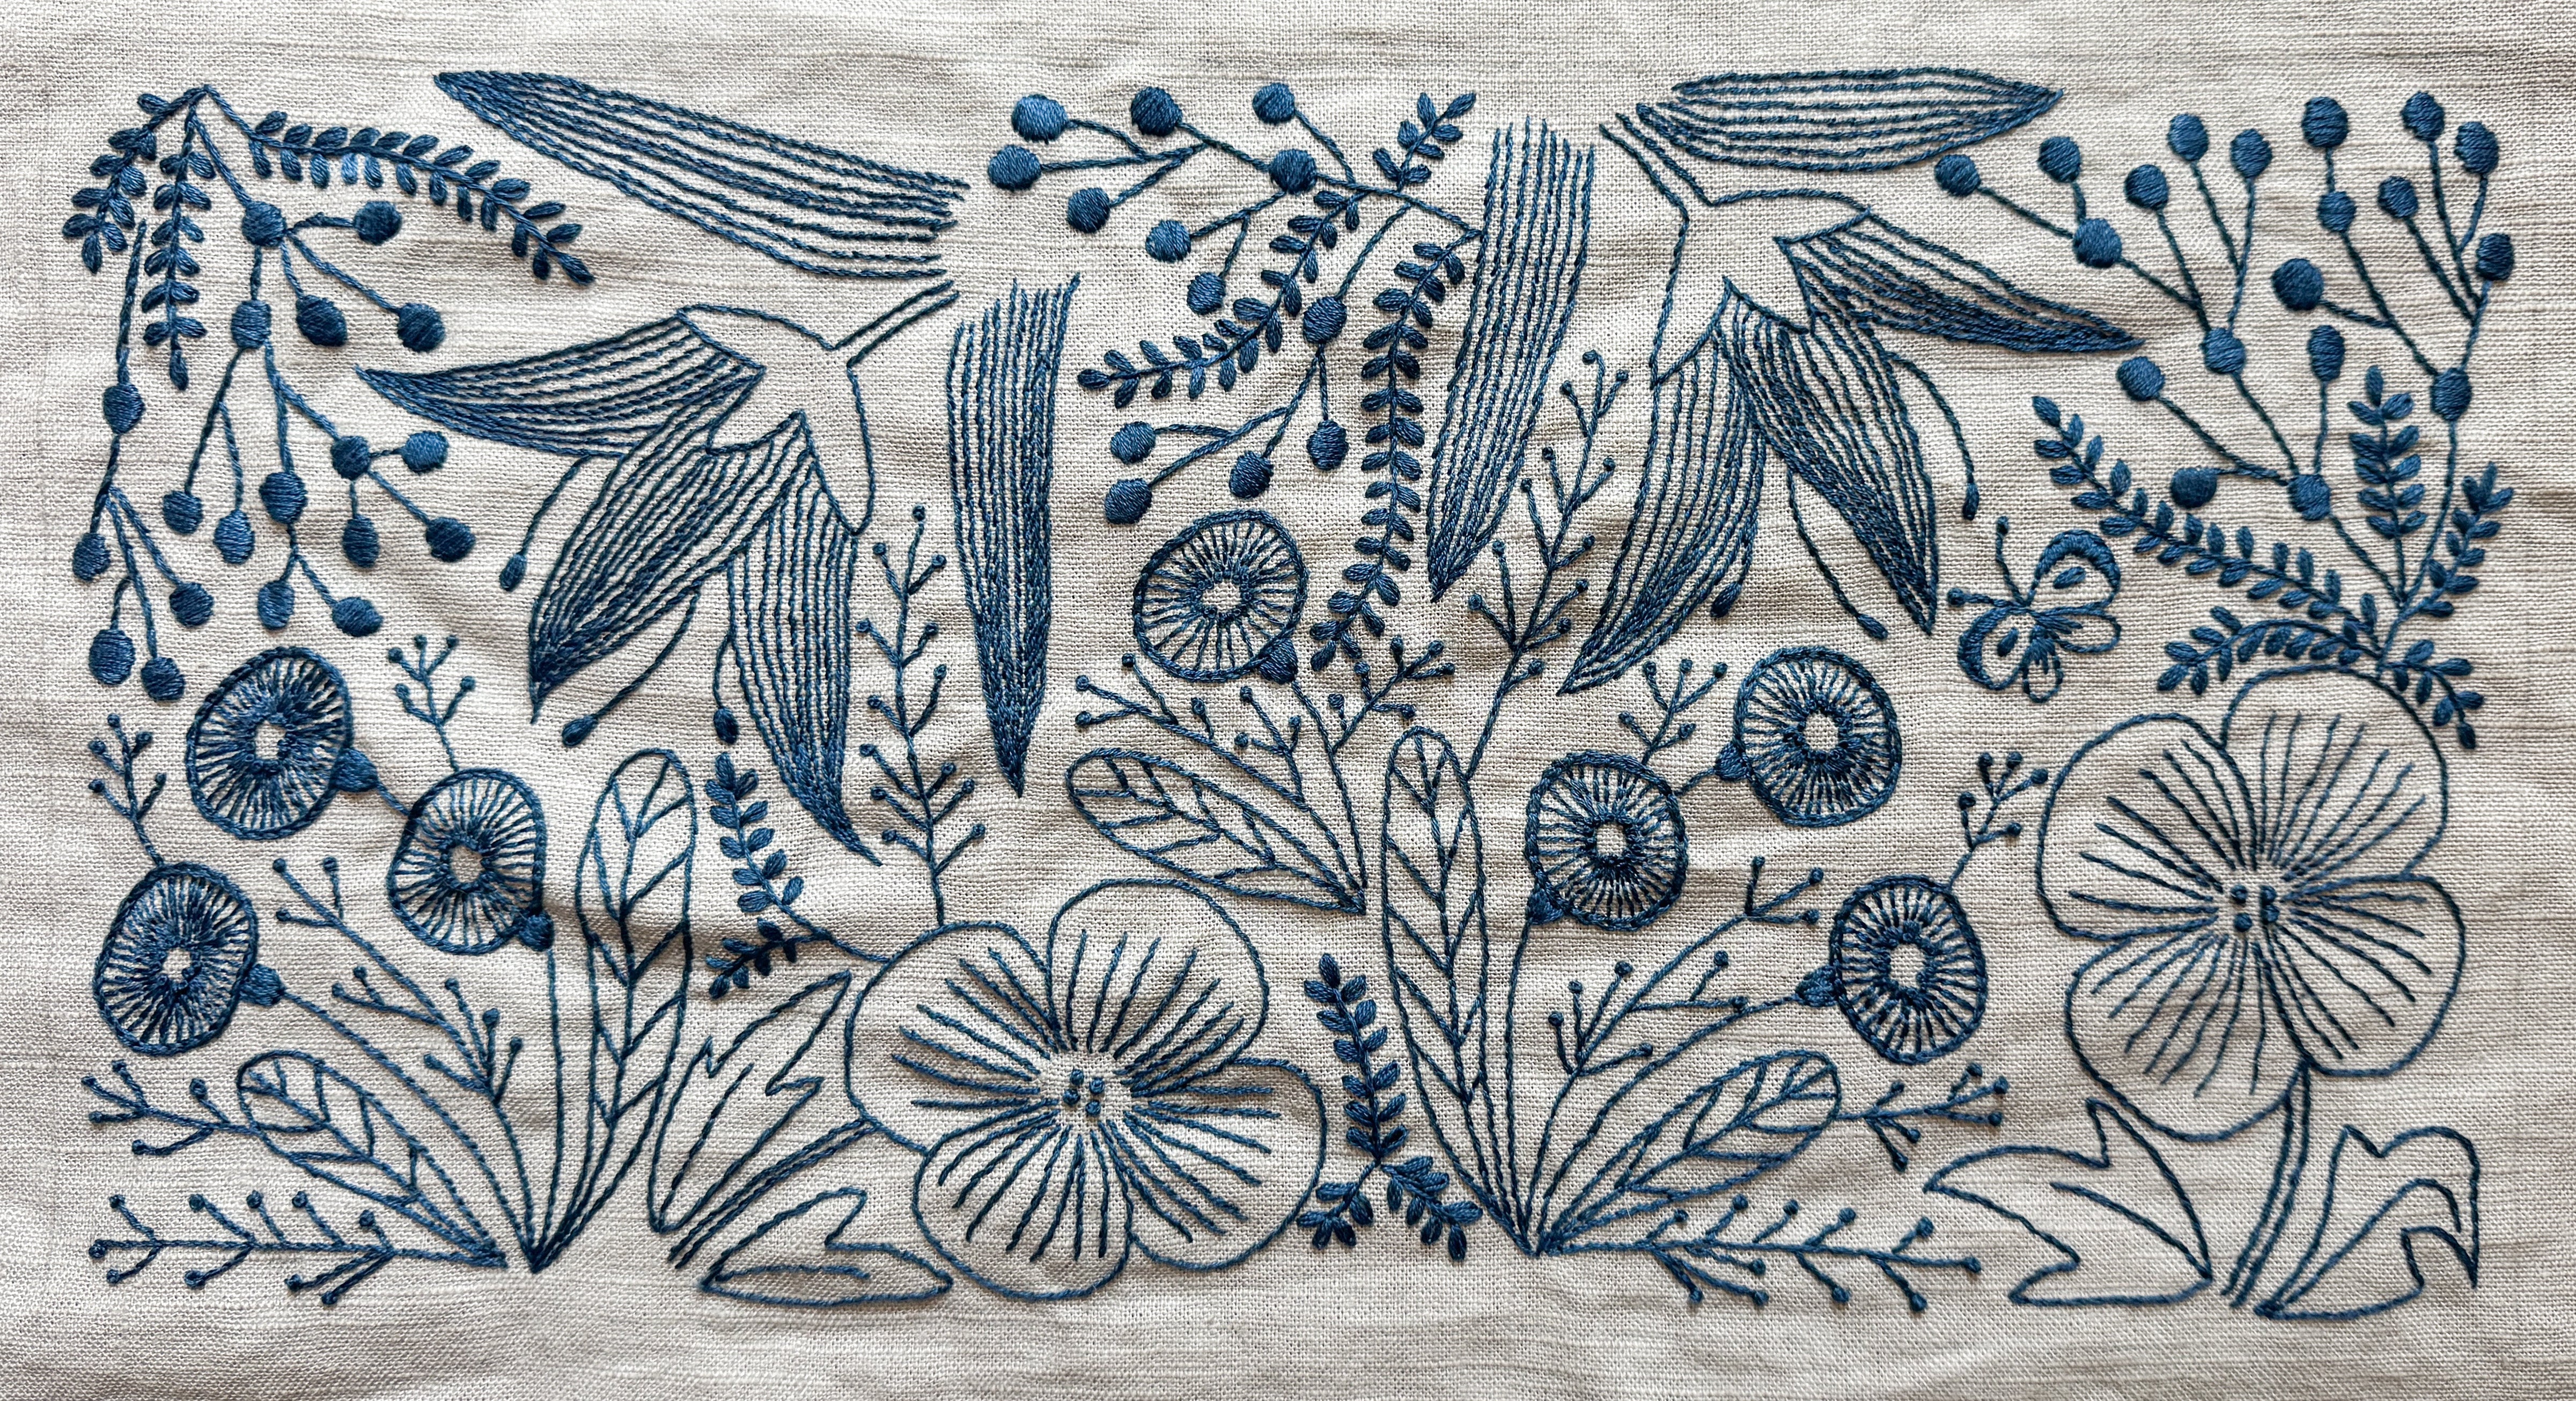
Inspiration came from Alice Makabe's book, Beautiful Botanical Embroidery. The cover shows a tote bag project with a stylized floral pattern that I loved. That was my starting point and I reworked the pattern to fit my 8.75"x16.5" cover area.

If you have a home printer/scanner, that's all you'd need to rework your own pattern. Use the scaling (%+/-) function on the printer to shrink or grow copies of your sketches or a pattern from a book. (Buy Alice's books!) I made individual copies of flowers and played with the arrangement until I was satisfied, filling in with some sketching. Here's where I ended up:

Download my sketch here. It's on two regular printer paper pages. Match it up at the yellow line.
Picking the Fabric
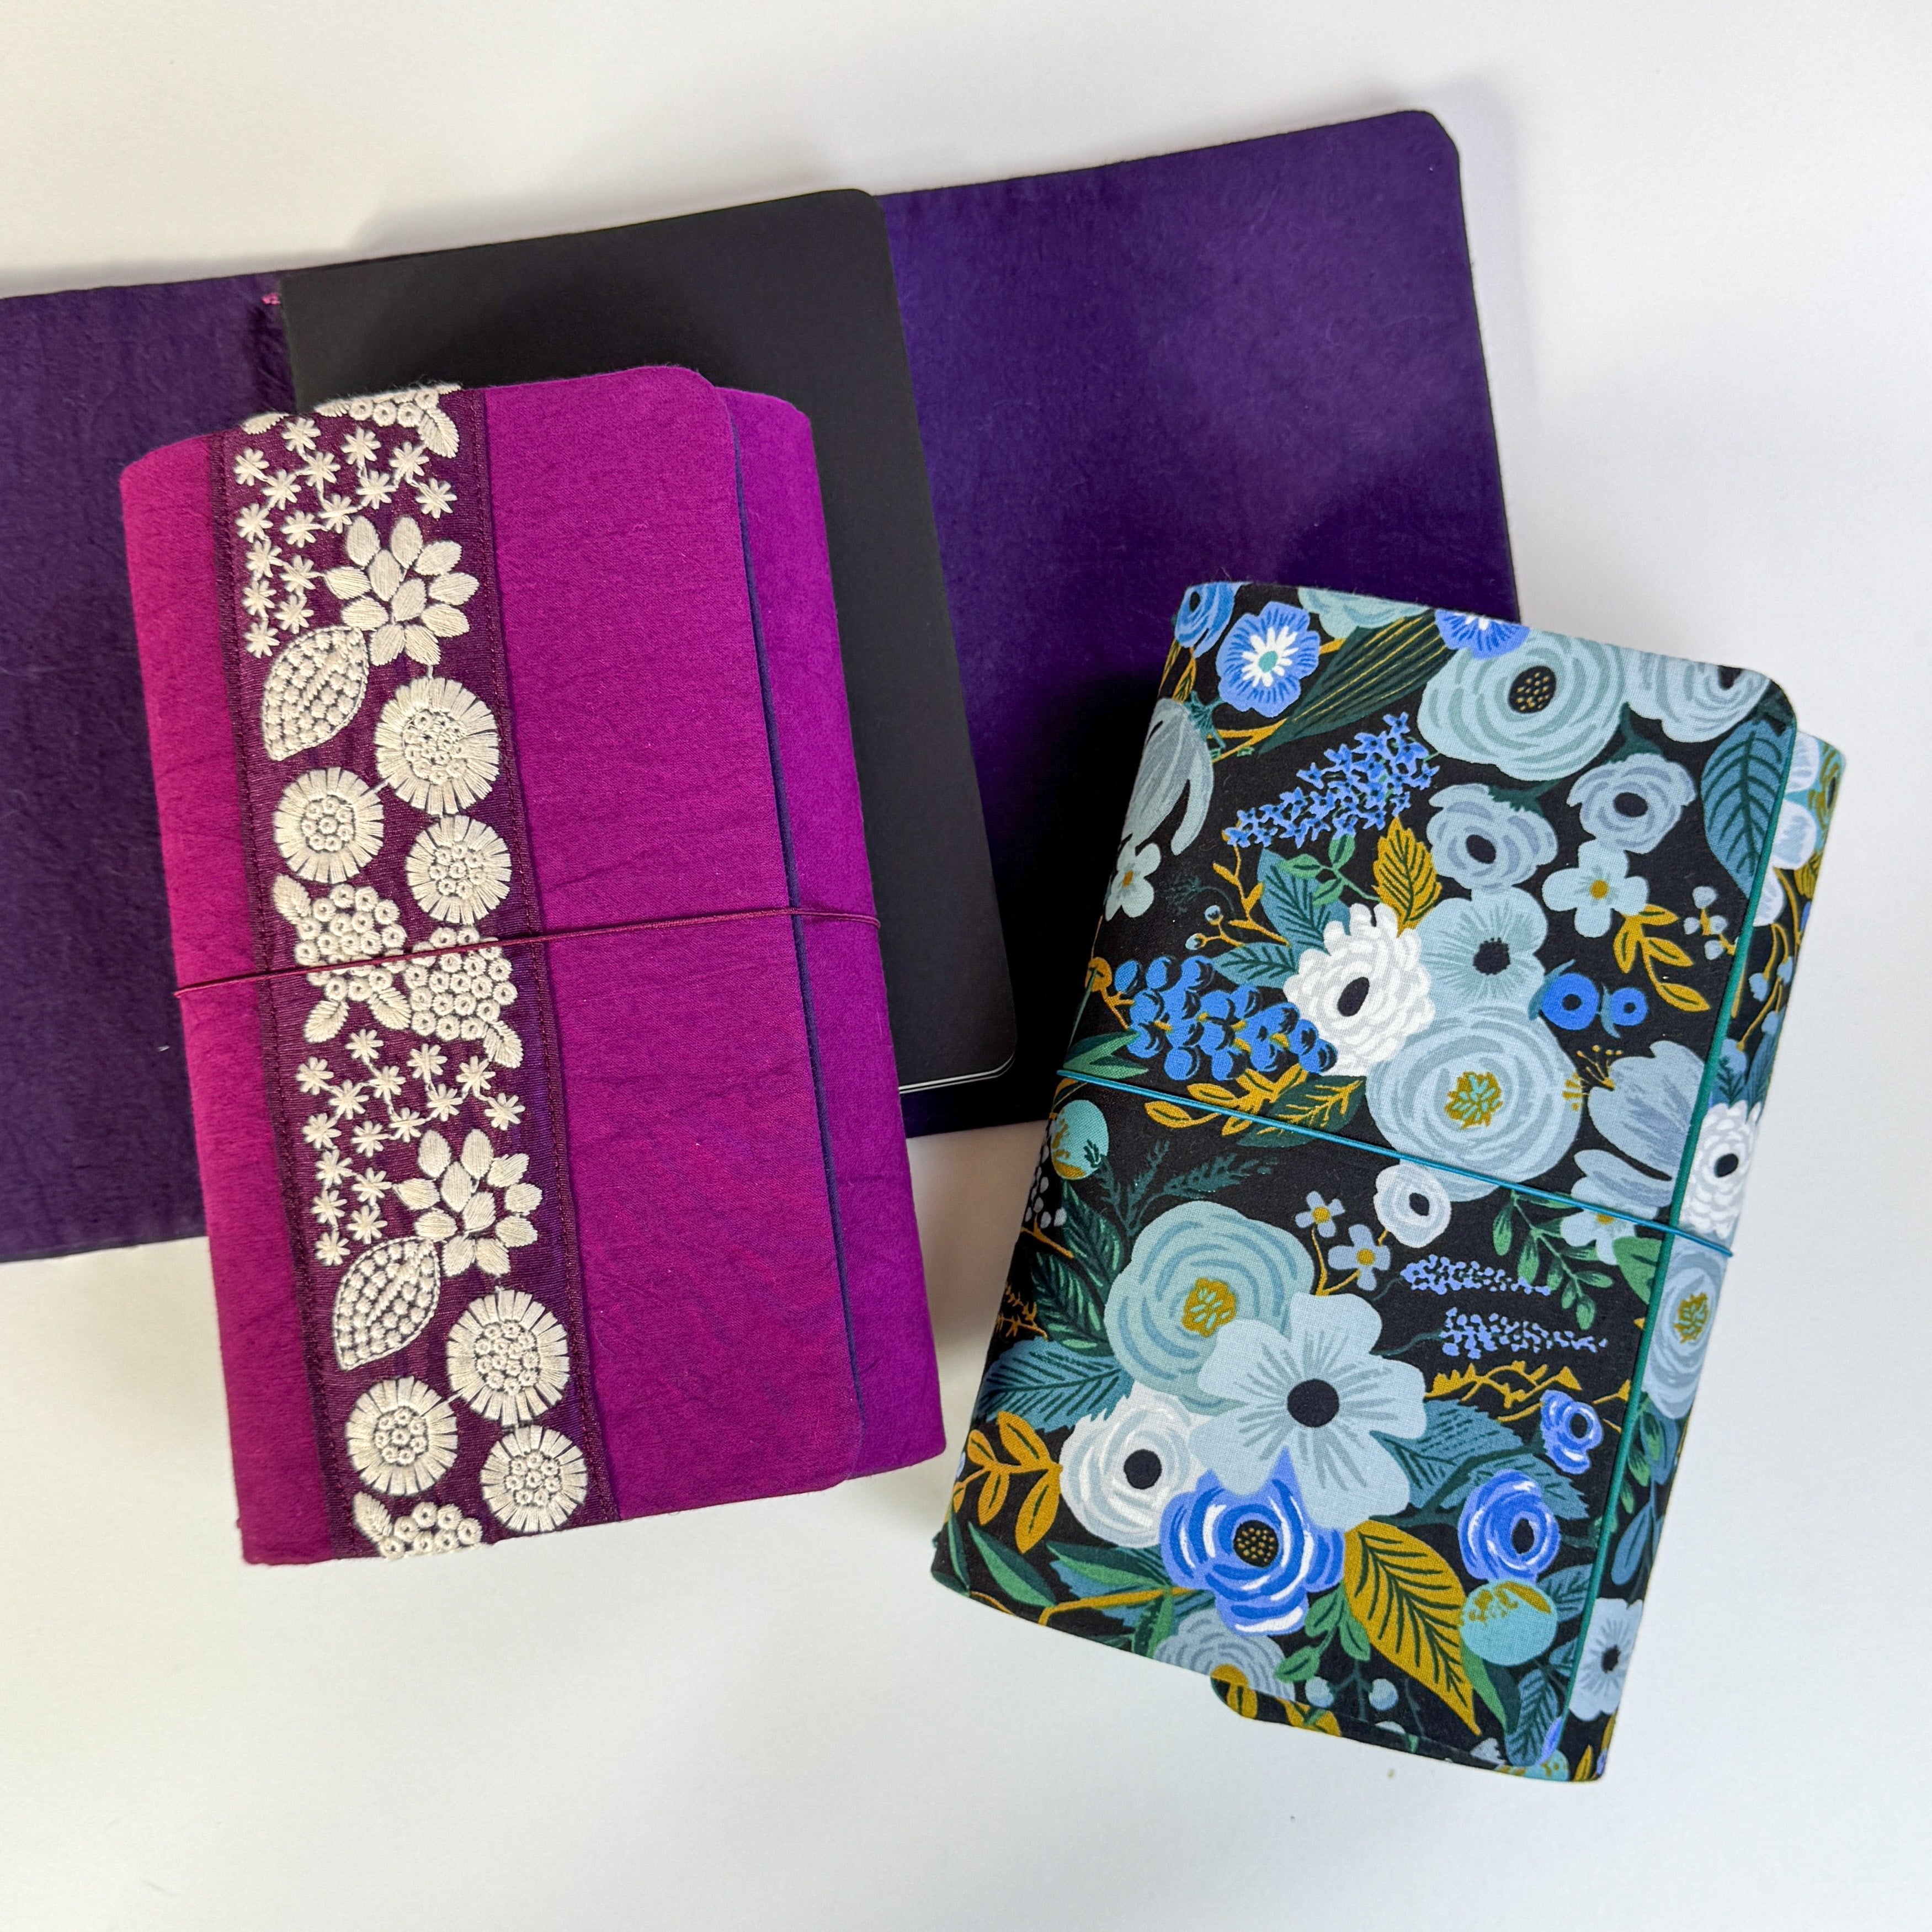
Next, I needed to choose what to stitch on. That was relatively easy, in this case. Years ago I had a sofa that needed to be recovered and I found a fabulous deal on some light grey heavy linen... a lot of it. As you may have guessed, that particular project never quite happened and the sofa 'moved on' from my living room. I still have a LOT of grey linen.
The heavy linen is a good weight for the cover. The outer fabric you choose needs a little heft. BUT, if you fall in love with some quilting cotton, which I frequently do, I simply add a layer behind the cotton. Choose something like a twill or denim or any upholstery weight scrap fabric. You won't ever see it, but it'll give a good base for the pretty top layer and you won't be able to feel the plastic insert through the cover.
For the lining, I couldn't resist using something from Liberty. I found a gorgeous navy colorway of Liberty's historic print "Lodden". Same advice as above-- add a second 'cushion' layer behind the thin cotton OR back it with some medium-weight interfacing.

Get to Stitching

Assembly

Final Stitches
All that's left is the finishing details. Stitch the insertion seam closed. I used some random fuscia DMC perle cotton to add the anchor points for the binding elastics. This worked well since I planned to add a hot pink closure elastic. While stitching the anchor points, I added some charms! (Love the extra little bling!)

And finally, I added the two internal binding elastics and the pink closure elastic.
TIP: To work with the elastics, find the needle with largest eye in your needle collection! It also helps to put a tiny piece of tape on the end of the elastic to guide it through the eye.

Always happy to answer more questions about this project! Please share photos of yours!


PS- Here's a full walk-through of my journals that I did for Instagram.

Leave a comment
This site is protected by hCaptcha and the hCaptcha Privacy Policy and Terms of Service apply.